The Hammer and Anvil
  • Home
  • What's in a box
  • Subscriptions + Tutorials
  • The Hammer and Anvil Merchandise
  • Tools for sale
  • Books
  • About
  • Contact
  • FAQ
  • Videos
    • Wanderlust Dust Tutorials >
      • Wanderlust Dust THE EARRINGS BOOKLET PDF
      • Fusing Gold Dust to Silver
      • Wanderlust Dust: EARRINGS ZOOM 1 of 2
      • Wanderlust Dust: THE PENDANT Booklet
      • Wanderlust Dust: THE EARRINGS Part FIVE
      • Wanderlust Dust: THE EARRINGS - Part four
      • Wanderlust Dust: THE EARRINGS - Part three
      • Wanderlust Dust: THE EARRINGS - Part two
      • Wanderlust Dust: THE EARRINGS - Part One
      • Wanderlust Dust: The Pendant - Group Session ONE 4/3/2021
      • Wanderlust Dust: The Pendant - Group Session TWO 4/11/2021
      • Wanderlust Dust : THE PENDANT - SNEAK PEEK
      • Wanderlust Dust: The Ring - Part ONE
      • Wanderlust Dust: THE PENDANT - PART ONE
      • Wanderlust Dust: The Pendant - PART 2 A + B
      • Wanderlust Dust: THE PENDANT - PART THREE
      • Wanderlust Dust Tutorial: The Pendant - PART FOUR
      • Wanderlust Dust Tutorial: The Pendant - PART FIVE
      • Wanderlust Dust Tutorials: Flattening the Fused Plate with a Hammer
      • Wanderlust Dust: The Ring - Part TWO
      • Wanderlust Dust: The Ring - Group Session ONE Jan 2021
      • Wanderlust Dust: The Ring - Group Session TWO Jan 2021
      • Wanderlust Dust Fusing with BUTANE
      • Wanderlust Dust: Pear Shape Stone
      • Wanderlust Dust Tutorial: The Ring PDFs of Template and Ring Blank Chart
      • Wanderlust Dust Tutorial: The Ring Booklet PDF
      • Wanderlust Dust: THE EARRINGS - Templates
    • May Box Videos
    • August Box Videos
    • Frame It! Video Tutorial
    • Starry Night Tutorial >
      • Starry Night Tutorial 1 of 2 CHAPTERS
      • Starry Night Tutorial 2 of 2 CHAPTERS
      • Starry Night Group Mentoring Session ONE A
      • Starry Night Group Mentoring Session ONE B
      • Starry Night Group Mentoring Session TWO
      • Starry NIght Group Mentoring Session 3A
      • Starry Night Group Mentoring 3B
  • Material Lists
  • Hold-It! Instructions
  • Making point burnishers for flush setting
  • Mentoring Schedule
Search by typing & pressing enter

YOUR CART

Learning Comes to You.
​Virtual Jewelry Making Workshops with Tool & Material Boxes

Virtual instruction will be delivered through detailed jewelry making tutorials presented in palatable length videos for better comprehension while working at your own pace. You have access to the videos ALWAYS! No expiration date or time limit!
Each box will have the featured jewelry making tool/tools and materials to make the piece of jewelry in the tutorial. You will have the opportunity to work with your jewelry instructor for virtual 1-hour
group mentoring sessions during the 30 days the box virtual instruction is open. One on One instruction is available per hour increment for more detailed mentoring. Each meeting will include a video play back that will be available to view, assuming no technical difficulties. 
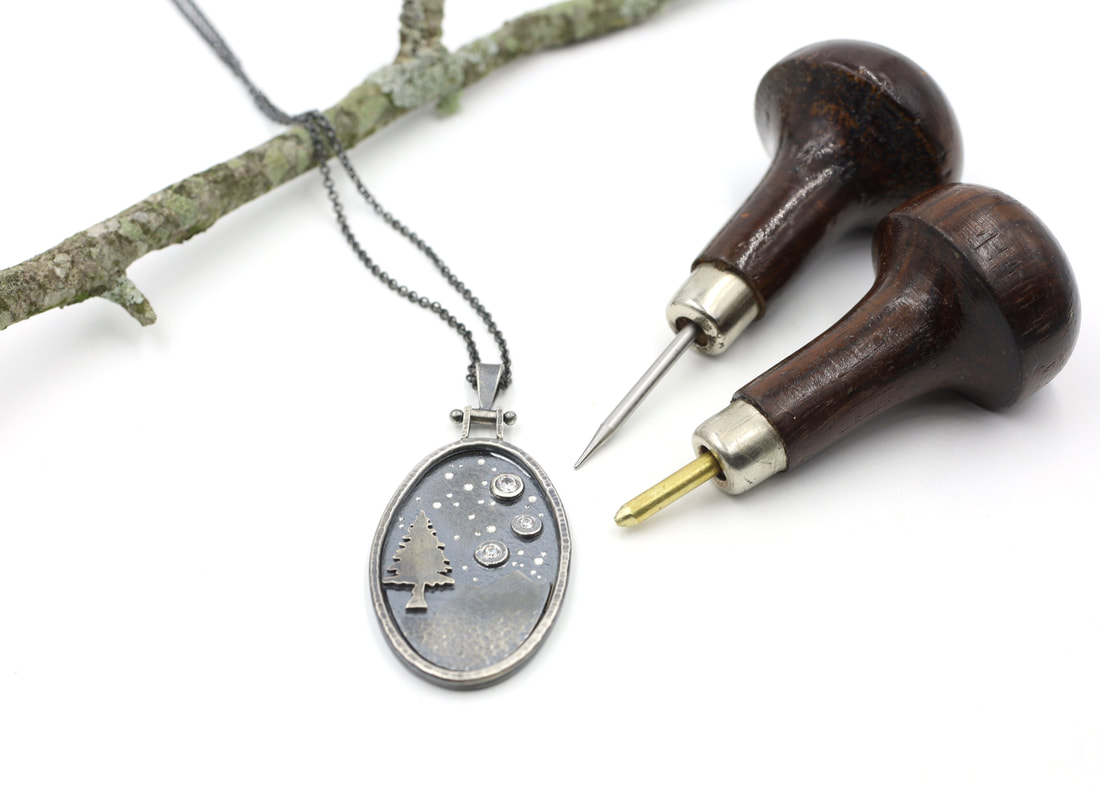
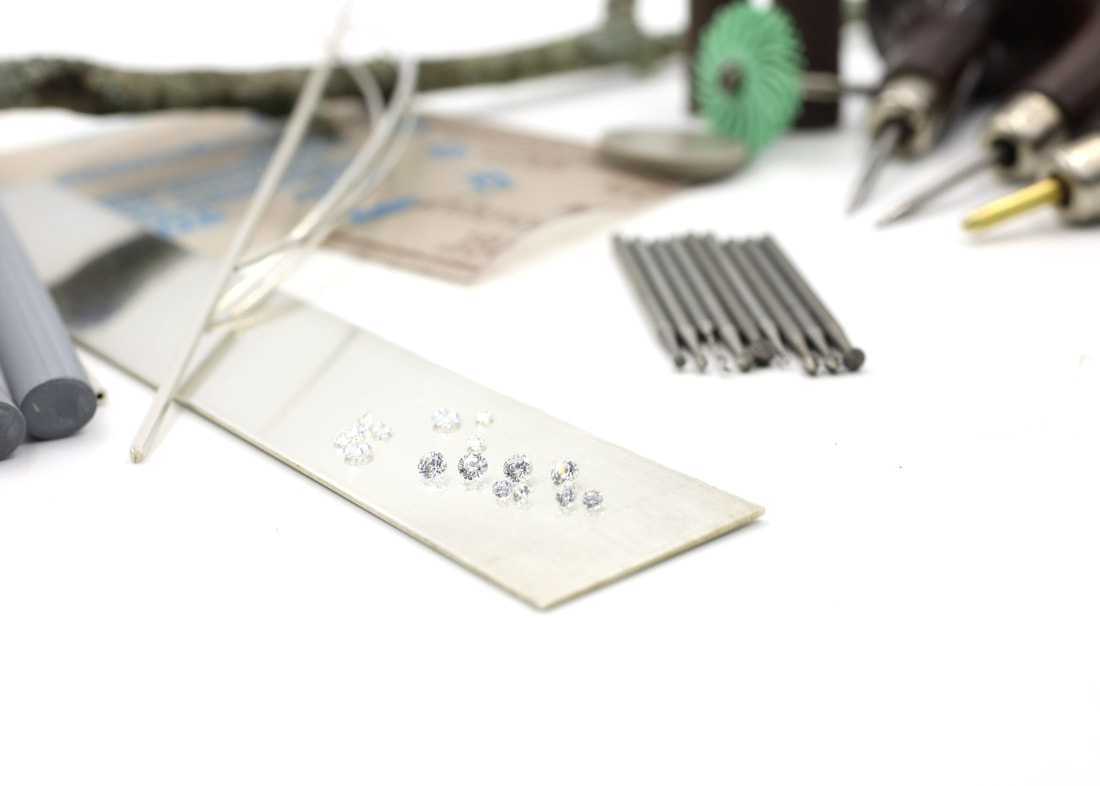
Picture

The Box

Your featured jewelry making tool (or tools) arrives on your doorstep! Quality materials to make a piece of jewelry are provided! 
Picture

The Instruction

The tutorial becomes live on the site and we meet for virtual jewelry sharing and learning over the course of the next 30 days.
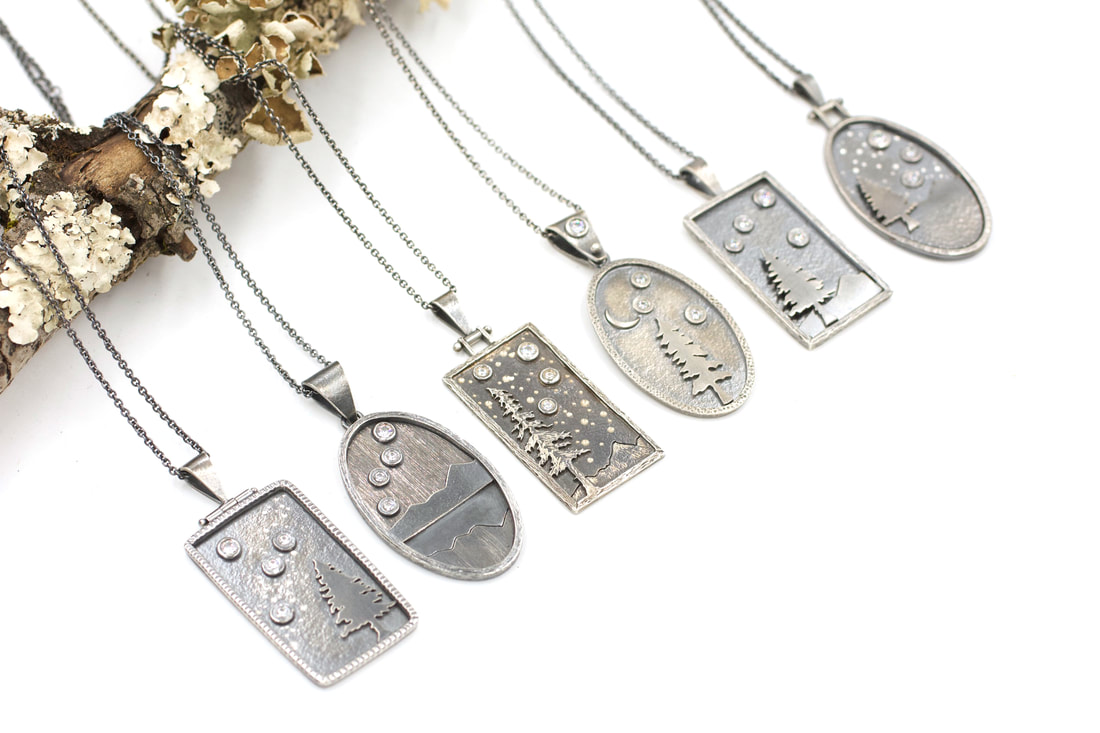
Picture

The Project

You make a beautiful piece of jewelry! The project based learning expands your skill set to create more refined and well executed art.

What's in a Box?

The Hammer and Anvil Starry Night Box-EXAMPLE as each tutorial box is unique!
​The Starry Night flush setting pendant tutorial will guide you through the process of making a flush set pendant using featured jewelry tools and sundries (see the subscription for details!) We will be focusing on the proper use of tools included in the box as well as general good studio practice. You will have all of the silver materials and gemstones to make the jewelry project TWICE! Your studio will need to be equipped with some basic metalsmithing and jewelry making tools, supplies and consumables to make the project. There will be a limited number of boxes available to keep the jewelry workshop experience intimate and allow for individual attention. We want to build community and fellowship through your experience. You will need basic soldering, sawing, measuring, filing, forming and flex shaft/rotary tool use. Previous stone setting experience is not necessary. If you do have some jewelry making experience, you will still learn something new! We will expand your skills with tons of information in these tutorials. We bring you 30+ years of experience through virtual learning!
Picture
Picture
Picture

What Tools Should I Have?

Basic metalsmithing and jewelry skills are needed but don't need to be refined. Previous soldering, sawing, filling, forming, and finishing is helpful but not required. If you have set stones before using a burnisher and/or pusher, you will still learn new skills. If you haven't, you will learn a ton!

There are some basic metalsmithing and jewelry making tools that need to be in your studio to be able to accomplish the project and future projects. Studio tools are needed but not limited to just these but an example of a basic set up. If you don't have all of these, contact me and we can decide what is absolutely essential or alternatives for success. There are great cost effective solutions when the tool is not in the cards at the moment.

  • Torch: Butane Big Shot at minimum should work but propane/oxygen, acetylene ambient air (Silversmith torch), acetylene/oxygen are preferred (Little Torch.) Any pinning (balling up) of wire is best done with a Little Torch set up for most success.
  • Fire safe area to solder. Can use a fire brick, magnesia block, charcoal block or pizza stone.
  • Soldering pick, tweezers and third arm or could just be soldering cross locking tweezers.
  • Pickle pot, copper or bamboo tongs and rinse bowls.
  • Hand files: one larger hand file and some smaller needle files.
  • Flex shaft or rotary hand grinder that takes 3/32" bits. (Foredom, Dremel, etc.)
  • Sandpaper or finishing paper in several progressive grits.
  • Basic chasing hammer.
  • Rawhide or nylon/derlin mallet.
  • Steel bench block or small anvil.
  • Drill bits in variety of sizes.
  • Jewelers saw frame and blades 1/0-5/0 sizes.
  • Bench pin
  • Magnification/optivisor
  • Rotary tumbler with stainless steel media.
  • Steel ring mandrel
  • Wood ring clamp
  • Shop vise
  • Internet connection for live streaming and video meetings.
  • Bezel roller, curved burnisher and bezel pusher.
  • Measuring brass gauge or digital calipers
  • Safety glass
  • Dust/particulate mask
  • Fire extinguisher
  • Access to water.